Its been rather windy here for the past few days and it sounds like it has been similar around the UK. We thought making a wind sock to test the direction of the wind is fun and then using it in the garden or during your walk (or both!) playing with it afterwards is also great!
You will need: Tissue paper (or a newspaper sheet would do - thin paper is best as it is lighter). A strip of card (or a few strips of paper stuck together to make a thicker, stronger strip), glue, a hole punch (or something to make holes - a sharp pencil would do), some string.
- Take a big piece of tissue paper and a strip of card.
- Glue the card onto one end
- Bend the card into a circle and stick the ends together
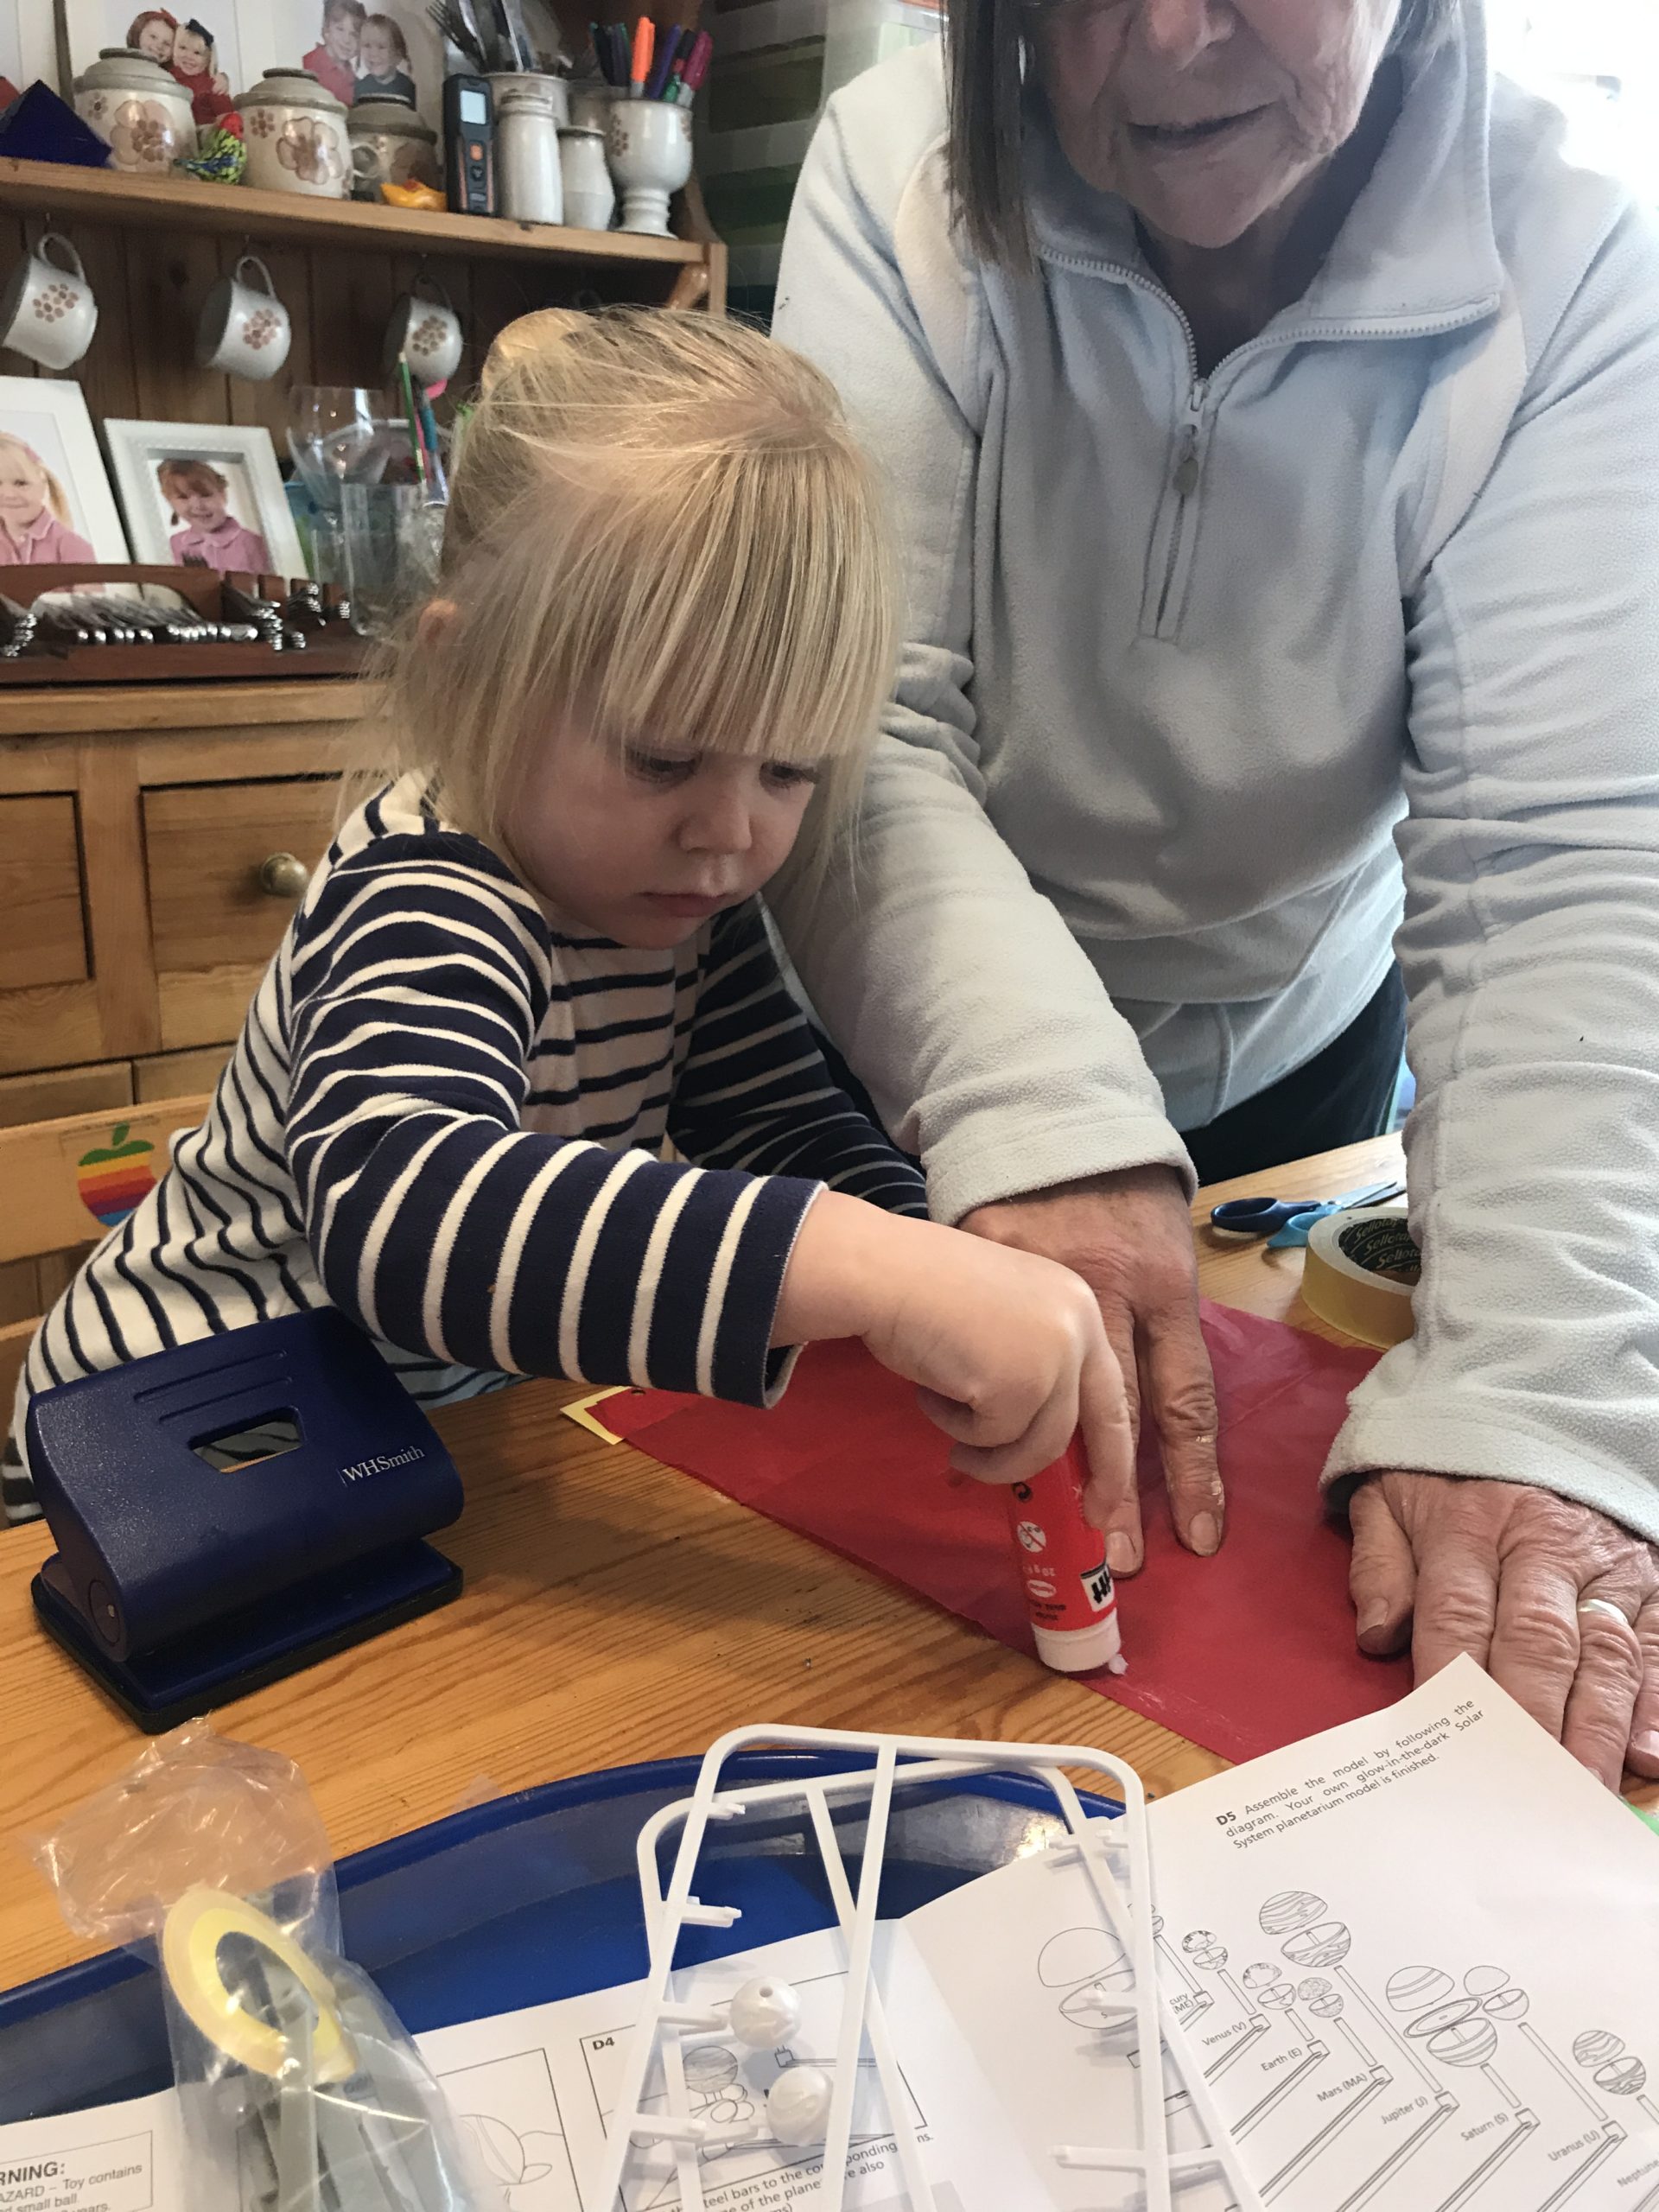
- tape the tissue paper along the seam to make a tube
- Glue tissue paper tails around the opening in a zig-zag pattern
- tie or tape 4 strings to the card
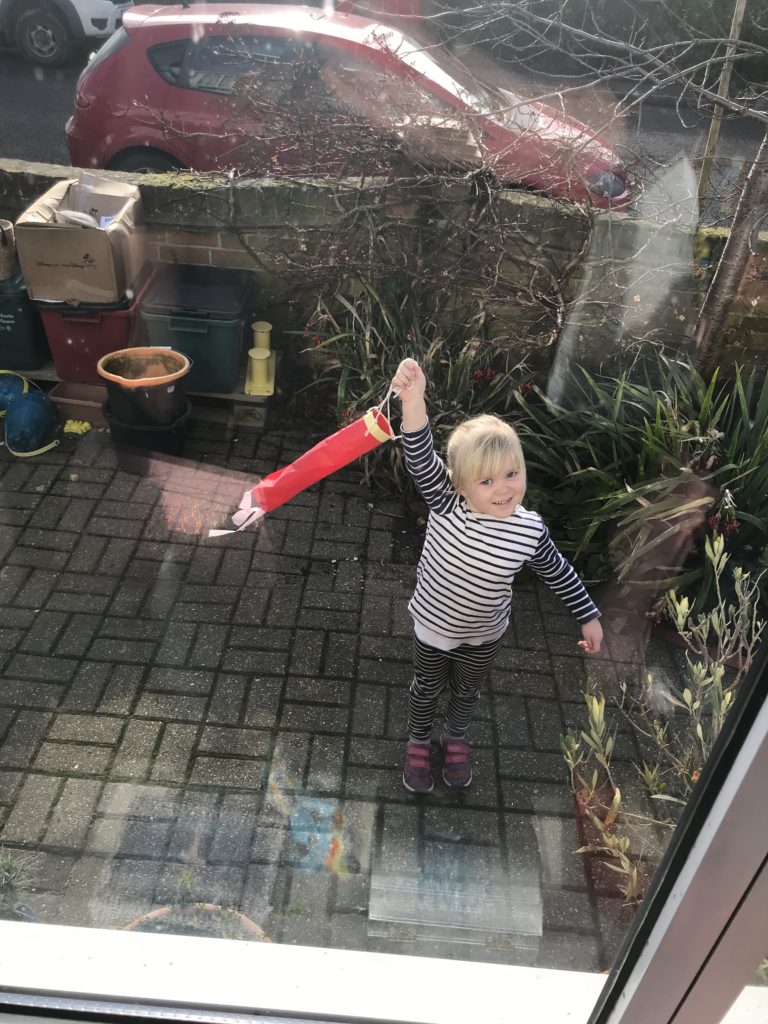
Hold up your windsock and see if you can work out which way the wind is blowing. You can try running up and down the garden (or a local space) to see if it flies behind you better in one direction or another - why do you think this is?
We spent a lot of time running with it, making it fly like a kite and then trying to work out of the wind blows in the same direction everywhere in the garden (it didn't) and looking at why it might change. Enjoy!


[…] Good morning. It's a new week and we are going with a bit of a theme this week. Lots of learning about weather! So today, after all the rain for the past few days, we are making a raincloud.... in a jar. This is always a popular activity at the beach school sessions we run - we hope you enjoy it too.You will need: some water in a jug (to pour), some food colouring (red, blue or green work best), something to gently drop water (a pipette, a water pistol, or the edge of a spoon), a clear jar, any type, some shaving foam (if you have gel, squeeze it out and rub it together to get foam. Squirty cream can work if you cannot get/do not have shaving foam. Fill the glass jar roughly 2/3 full with clear water. Mix some of the remaining water with the food colouring, and practise making drops with your object. You need the drops to be added gently (if they are just poured directly you get a hole in the shaving foam, you want them to work their way through slowly). Can you add two or three drops at a time. Now you've practised, you're ready! Empty the jar and refill 2/3 with clear water. Add shaving foam to fill the top - you will want about 4cm of shaving foam (to represent the clouds) on top of the water. Now, drop the coloured water slowly, bit by bit, on top of the shaving foam. Watch it make its way through. This will be the rain. Stop every 10 drops or so and watch to see if it is raining in the jar yet. It's great to see the rain start to appear as the cloud (the shaving foam) gets full of coloured water. If you have a slightly older child, you might want to use this resource from BBC Bitesize, explaining the water cycle. It's aimed at KS2, but my 4 year old and 6 year old both watched it and understood some of it.If you enjoyed this, you might also want to try our other weather experiments; making a rain gauge, creating rainbows, making a wind sock, […]
[…] you enjoyed this activity you might also enjoy our other weather activities: making a rain gauge, making a wind sock, making it rain in a jar, making a cloud in a jar and cloud […]
[…] you enjoyed this activity you might also enjoy our other weather activities: making a rain gauge, making a wind sock, making it rain in a jar, making a cloud in a jar, cloud dough and a tornado in a […]